
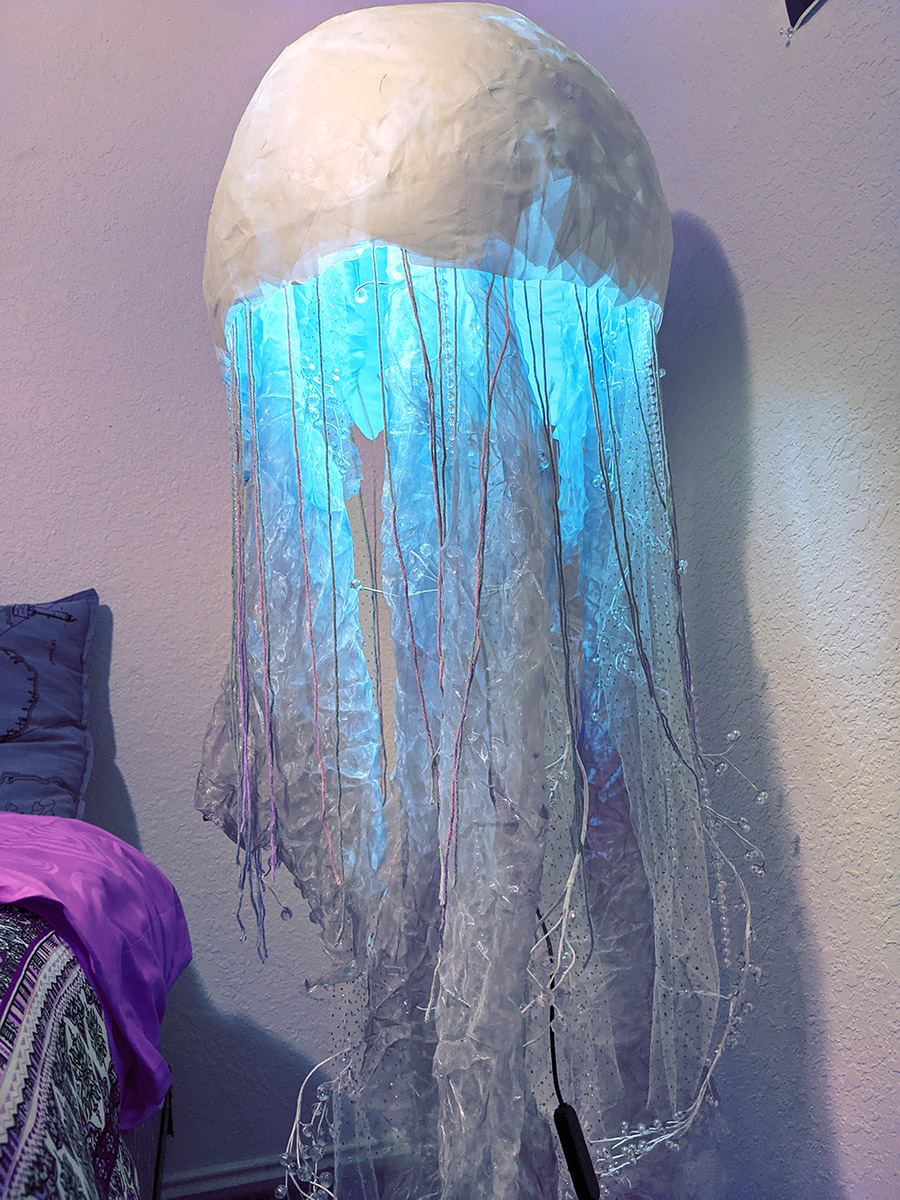


Looking for the next cool thing to add to your house or just a fun DIY project to embark on? Well, this Jellyfish Floor Lampshade might actually help with more than just being Super Cool Looking! After learning about how my sleep schedule is affected by both the level of brightness of lights at night, and if a light is above eye level, I wanted to fix that!
Turns out that overhead lighting hits the cells on the bottom retina, and (of course) those are the ones most relevant to being able to sleep at night. And despite what people say about blue light, it’s not just blue light that’s harmful at night. It’s also the brightness of light that impacts a sleep schedule. “A mere 8 lux—a level of brightness exceeded by most table lamps and about twice that of a night-light—has an effect [on circadian rhythm]” said Steven Lockley, a sleep researcher at Harvard. So yeah, making a far dimmer floor lampshade (emphasis on the shade) seemed like the proper modification to do with my existing lamp. And so far for me, I can report better energy level at work and feeling more rested just from switching to dim lamps like this at night!
So how does one make this healthful, yet IKEA-designer-worthy DIY lampshade? It’s actually a fairly simple process!
Supply List

- Hot glue gun, and gluesticks
- Old printer paper stack
- You might be able to use other paper but it needs to be fairly sturdy to hold all the weight of its tentacles. And on the other hand, too thick of paper will prevent light from coming through by the time you get to the third layer. You can test it by holding several sheets up to your light. You want to see enough light coming through that it’d still be a functional, yet dim lampshade.
- Mod Podge
- 3′ Inflatable ball
- It can be bigger or smaller depending on how big your existing lampshade is. You’ll be covering about half of the ball to make a “half moon” shape, so keep that in mind when measuring it.
- Bits of string
- I used a leftover grapefruit size ball of yarn. I cut them into lots of 1.5′ – 2′ strings, (varying the size intentionally).
- Floor lamp with LED* bulb
- NOTE: The bulb MUST be LED. Do NOT use other bulbs. Any other bulb that heats up can start a fire using only the following instructions (i.e. without building a lampshade harp). This tutorial does not cover how to build a lampshade harp.
- I used a Ring Light that came with an extendable tripod.
- Sheer fabric
- You need enough length that it almost hits the floor when held up to your existing floor lamp. I used 8 strips that were about 12″ wide, total.
- Other “tentacle” pieces, get creative!
- I found iridescent clear mardi gras beads, and some white ex-Christmas floral to hang down.
- Actual jellyfish reference photos – it helps to achieve the “look”! You can look around your house for pieces to add using an inspirational photo.
- Pencil

Instructions
- Inflate your ball. Rip up several sheets of paper until you get lots of palm-sized pieces.
- Mix together mod podge and water in a small bowl until you get about a 50/50 ratio.
- Set the ball so the inflatable area is at the bottom and won’t be covered. Dip the paper into the glue mixture and lay it on the top of the ball. Continue laying down paper strips until you get about halfway down the ball, a “half moon” shape. Then start again at the top, working down and add 3-4 layers of paper total.
- Test by holding it over your lamp light to be sure you went far enough down the ball that that it will cover the lamp light.
- Leave it to dry overnight or longer. Make sure it’s completely dry – it’ll be rock solid to the touch.
- Deflate the ball and carefully peel it off.
- Put the paper mache jellyfish “bell” over and on top of the lamp until it’s even and balanced. Mark where the lamp will touch the top by tracing around it with the pencil.
- Use the hot glue gun to adhere sheer fabric strips for the “oral arms” close to the top of the “bell”, from the inside. I made four oral arms, according to the jellyfish anatomy diagram.
- At the bottom of the bell, from the inside, I glued down the string at varying points – keeping some closer together, some farther apart, up to about 6″ inside the bell. Nature is messy, so I avoided making it all perfectly straight for a more organic and lifelike jellyfish look.
- After that, you can glue on any extra pieces you’ve collected! Decide whether they’re tentacles or part of the oral arms. I used the mardi gras beads as tentacles, and the ex-Christmas floral as the oral arms by wrapping the sheer around each piece and glueing it down at the top. Balance the jellyfish over your LED light and boom – you have a new talking-piece! Enjoy!


