
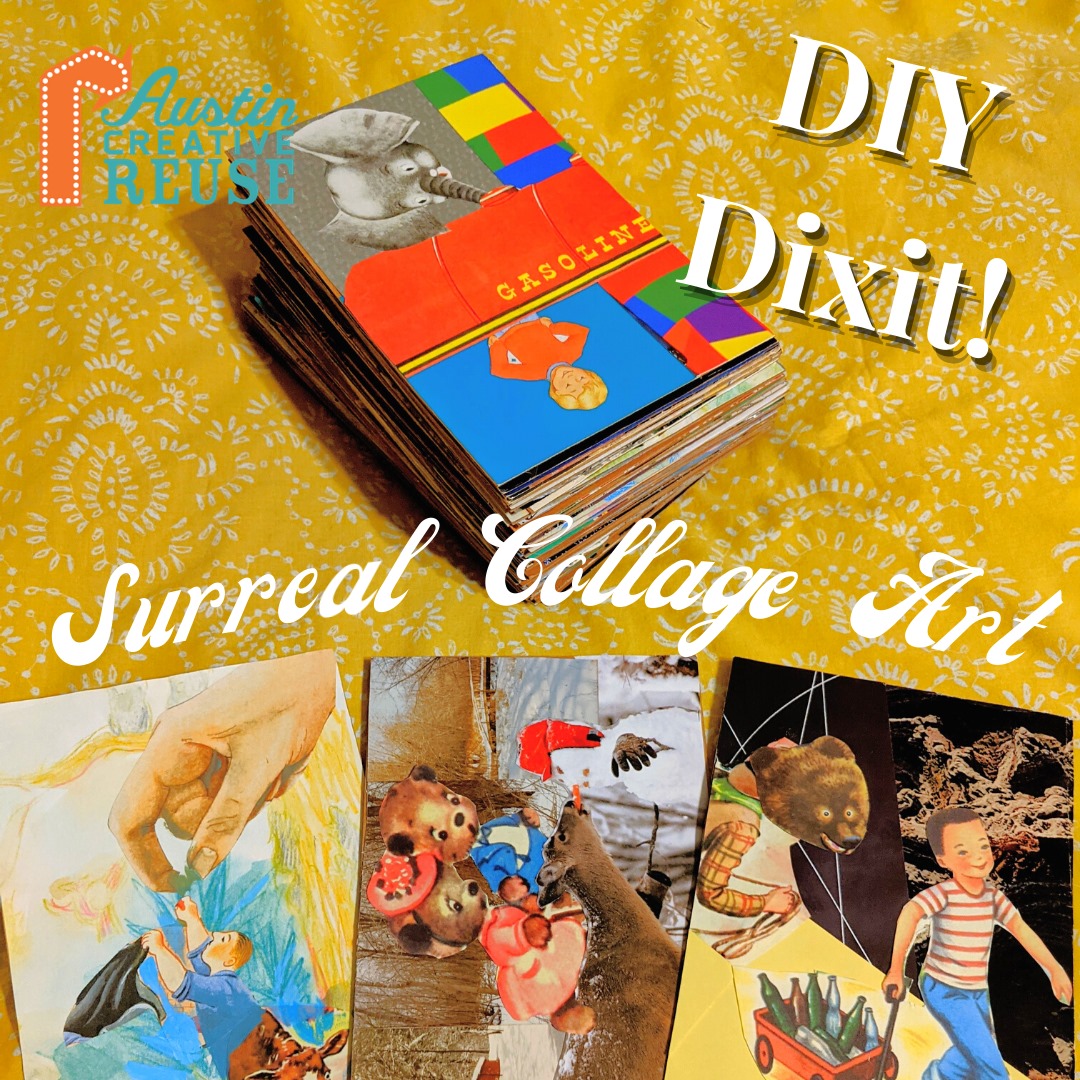
Do you want an excuse for you and your family/friends to play around with collage? Have a go at making your own Dixit game! This tutorial was originally posted on Austin Creative Reuse’s blog, but was written by me!
There is an accompanying video below where I provide 20 tips for creating surreal collages, plus, Austin Creative Reuse also has kits available in their online store! Thanks to my friends and family who helped contribute cards for our personal deck!
Let’s get started!

What is Dixit?
This is a game that relies solely on having surreal artwork on a deck of cards, so it’s super flexible and fun to make, and even more fun to play! It’s similar to the popular games Cards Against Humanity or Apples to Apples, but think artwork instead of words. Everyone gets a chance to think outside the box in this really fun game!
What’s the game like?
The goal is to get the most points by the end. Everyone gets dealt a hand of cards which all contain surreal artwork, and players take turns being the storyteller. When it’s the storyteller’s turn, they look at their own hand of cards and pick one for that round. The storyteller gives the other players a hint at what their card might be by either telling a story, making a joke, giving a vague one word clue; whatever they want! All the other players look at their hand and choose a card that they think best matches the clue given that round. Then the cards are anonymously displayed in front of everyone… and it’s time to vote! Points are assigned based on votes, and winners are the ones who have their cards voted on. Complete details about gameplay mechanics can be found here.
Sounds fun, what do I need to make my own Dixit?
Basic supplies:
- Sturdy, matching file folders (or anything that would work as the back of the cards, such as empty cereal boxes, or card deck)
- Mod podge
- Brushes (for painting and applying mod podge)
- Acrylic paint
- Water cup
- Rag or paper towels
- Scissors
- Plastic wrap
- Something heavy to press down on drying cards (such as a stack of books)

Ideas for sourcing collage material:
- Scrapbook paper
- Children’s books
- Illustrative art (think of art that’s meant to tell a story or convey something specific, rather than art for the wall)
- Abstract artwork
- Vintage magazines
- National geographic
- Artistic or vintage photographs
- Wall paint samples
- Calendars
- Sheet music
- Maps
- Other 2D stuff!

Optional, but helpful:
- Other collage tools, such as: punches, flat, non-3D embellishments, mats, and cutting equipment
- Paper cutter (to trim your file folders evenly into cards)
- Laminator (makes the cards more durable)
Okay I have the supplies… How do I make the game?
Step 1: Trim the file folders into same size cards
After trimming off the non-rectangular elements of the file folders, I divided them evenly into thirds. You can choose to follow the example below, or pick whatever dimensions you prefer for your cards to be!
You need a minimum of 86 cards for a viable deck, but you can make as many as you want!

I used a paper cutter and some rulers because I wanted my cards to be exactly the same size. You could also look at getting sturdy card stock that’s pre-cut to a certain size if you want! The sturdier the better though, unless you have a laminator!
Step 2: Tear out background ideas
I used all kinds of things (listed above in the collage materials list) so look around your house or visit ACR to find more two-dimensional things that would make for an interesting backdrop!
I put potentials in a folder labeled backgrounds. There’s no need to cut them to size at this point in time, as you’re not even sure you will be using them!

Step 3: Cut out interesting characters
This is the most time-consuming step, but it’s also the most rewarding later on. Imagine trying to build a house out of Legos… if you had to carve every single Lego as you were building it! The same principle applies here.
Me and some friends spent some time cutting out characters before we went about designing our scenes. It was totally worth splitting the days, and we were shocked at how creative the scenes became!
If you’re sure you’re going to use a character, go ahead and finely cut out at least the top portion of its head and shoulders so you can easily compose a scene later. For other potentials, all you need to do is roughly cut it out, because you can always refine it later if you decide to use it.


Step 4: Organize characters and subjects
When you’re making 86 cards, you need a lot of organization to do it efficiently! I suggest setting up some folders with labels. That way, when you’re trying to find something for your frowning horse character to wear on his head, you’ll have a folder of objects you can dig through to find a perfect hat!
Suggested categories include:
- Small, medium, and large characters (illustrated)
- Objects
- Symbols
- Photographic / real life
- Stickers

Step 5: Arrange a scene
This is the most playful and fun step! So much potential… Should the smiling dolphin man be dancing in a winter forest..? Or on a giant book! Don’t cancel any ideas just because they don’t make sense… If anything, it will add to the surrealness!

Step 6: Glue down the scene
This is where it pays to be patient and thorough. Using your brush, carefully apply a small amount of mod podge to the entire front of the card, without getting any glue on the backside (otherwise your card will have a distinguishing mark).
Apply your background and make sure there are no ripples. Let it dry under something flat, like a stack of heavy books wrapped in plastic wrap (so that the cards don’t stick to the books, and peel off when dry).
Keep track of your characters since they will be separated from their background for this brief amount of time. I usually take a photograph before I separate them so I don’t forget any elements, then I put them in their own folder labeled In Progress.
Once your background is flat and dry, it’s much easier to glue down the characters. Again make sure that you completely cover the backside of the character before applying it to the backdrop. Any loose pieces will stick up as you play with this deck. Dry your card the same way as before.
If you don’t plan on doing any painting with acrylic paint, you can go ahead and skip the next step, moving right into Step 8, the final mod podge layer. This way you only dry your cards twice instead of three times.

Step 7: Blend with acrylic paint
To achieve a sense of surrealness to your scenes, it helps to tone down the collage aspect of the cards by blending elements with paint.

Step 8: Add final mod podge layer
Finish it off with a layer of mod podge on top of the entire card before putting it under the plastic wrapped stack of books to dry for a final time.
When your cards are done, you can also laminate them if you have the opportunity! I recommend leaving the backs plain, without mod podge, but you can experiment on a test card to see what you prefer!
And that’s it! You’re done with the art and creation part. Now it’s time to learn the mechanics of the game so you can play with your friends!
TIP: You can try making one card all the way through with these instructions just to see the process, and then if you want to make a lot of cards more quickly, you can break it down into the big steps as I described above, not moving on before you’ve cut out all the characters for many cards, and so on.


